

Many of us have a fond memory of an older relative who made beautiful handcrafted work. Carrying on a generations-deep tradition of Irish crafting, the history of making is baked into our DNA in Ireland.
Throughout our past, from the Vikings to the Celts, Normans and beyond, generations of skills were passed down through families and makers, leaving a legacy of knowledge and artistry that has continued to enrich our culture.
You don’t have to be master maker or need a lot of tools, money or exceptional skills to enjoy a part of our shared heritage. To carry on those traditions, here is an easy guide to trying your hand at some accessible crafts at home, with tips and tricks from the experts.
Be a knit wit
Almost everyone’s go-to starter craft experience, knitting has had quite the resurgence in recent years, spurred on by celebrity early-adopters like Julia Roberts and craft queens such as Kirstie Allsopp. It’s almost a decade since Penguin started re-issuing its knitting books, while craft magazines aimed at the knitting community have found a whole new audience. Rosemary Murphy, who opened The Constant Knitter on Dublin’s Francis St over eight years ago, also runs regular classes for fledgling knitters. “We get a mix of young students starting out and then those who used to knit but haven’t for years,” she says.
The first advice she gives everyone is to start off with inexpensive, but good quality yarn.
The next step is to match the yarn to your needles, which should also be of good quality, she says, emphasising, “your tools are everything, spend on your tools.” The next step is to pick a pattern that is doable – scarves are a failsafe option. Rosemary encourages all knitters to just stop if they get bored. “With a scarf, for instance, you can just cast it off and make it into a cowl,” she says.
From there you can progress onto more advanced stitches and patterns. But be warned, once you cast on, it can be hard to cast off. “Irish people weren’t historically great knitters, but actually it is completely addictive.” Younger knitters have also realised that they can copy some of their favourite catwalk pieces for a fraction of the price. Often pieces get patternised: recently The Constant Knitter has sold a pattern copying Harry Styles’ cardigan to a host of knitters. “His may cost €2,000, and they can make it for €20 to €100. It makes a huge amount of sense to do it,” Rosemary says.
[ Theconstantknitter.ieOpens in new window ]
Lovely in lace
First produced in Ireland from the 1730s, Kenmare Lace is a needlecraft lace which is a highly skilled and very delicate craft and was promoted by Irish aristocrats such as Lady Arabella Denny, a famous philanthropist. Worn by the wealthiest women across Europe, lace was ironically produced by some of the poorest women in Ireland. A luxury commodity, it was used to decorate elaborate wedding dresses, christening robes, and church vestments.
Nora Finnegan at the Kenmare Lace and Design Centre has been running courses for decades, as well as curating some of the best examples of 18th-century lace in the country. When teaching beginners, she usually gives a one-on-one session and starts with the basics, which in this case are the stitches. “Once you’ve got that right it’s a lot easier,” she says. “The starting tools are very simple, with a needle and thread and the cotton or linen thread all you will need. You lay your design on, with see-through paper which prevents the needle from sticking in the cloth.”
There are endless patterns to choose from, with a range at the Kenmare Centre that were produced by local nuns and which were recently restored. “They look like they were drawn with a microscopic pen, they are so fine and detailed,” Nora says. The essential thing with starting a piece of lace is to begin with a series of basic stitches, and finesse them. “You must get basic stitches right, you’ve got to learn it right,” she stresses.
Sticking to the pattern isn’t as important as some might think. “Lace is very versatile,” says Nora. “You can do all kinds of things with it. You can just start with a centre motif, and we have other patterns too.” Nora advises you to use the internet too wherever you can for advice, but to buy your materials from a good, local source.
[ Kenmarelace.ieOpens in new window ]
By hook or by crook
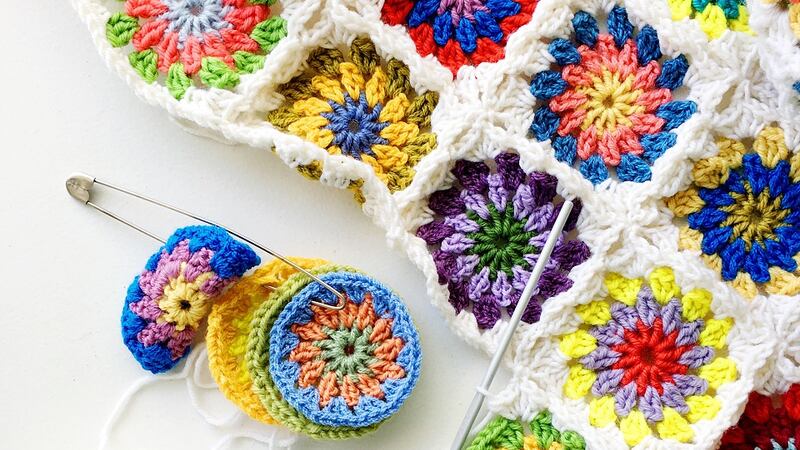
Knitting’s more delicate cousin, crochet involves a lot of the same moves as knitting but with a slightly different kit for a very different result. The key difference between crochet and knitting, beyond the implements used for their production, is that each stitch in crochet is completed before the next one is begun, while knitting keeps many stitches open at a time.
In the 19th century, as Ireland was facing the Famine, crochet lace work was introduced as a form of famine relief. As a result, men, women and children joined a cooperative in order to crochet and produce products to help with the relief during the Famine. You can discover more about the history of Irish crochet lace on the National Inventory of Intangible Cultural Heritage.
Carrie of The Knitting Room wool shop in Dublin also runs crochet classes. She recommends borrowing a book from the library on beginner’s crochet. “Sourcing YouTube videos is also a valuable resource, but in both instances, it’s really important to search for an Irish or UK published book or video, as terms used in the US and Canada are different and can be confusing for beginners.”
First steps to master include how to hold your hook by using either pen or knife grip, “whichever feels most comfortable”, says Carrie. “Begin learning the basic stitches on a light-coloured double knitting wool using a 4mm hook, then move onto learning how to create a chain. Next, try double, treble crochet stitches and a slip stitch. Once you’ve mastered these stitches, you can progress to creating your own blanket.” In terms of a suggested beginner’s tool kit, Carrie recommends a 4mm or 5mm crochet hook, darning needles and crochet stitch markers.
The most important part, says Carrie, is to take your time. “It’s a skill for both right and left-handed, so go at your own pace and don’t get discouraged. We have a support group called The Knitting Room Craft Circle on our Facebook page where our customers and students interact and knitting or crochet questions are asked and answered. Be warned, crocheting is addictive, but very mindful and good for your mental health, especially in these challenging times.”
[ Theknittingroom.ieOpens in new window ]
Basket cases

Basket making is one of the oldest crafts in the world, and probably one of the most widespread too. In Ireland, the tradition of basket weaving goes back centuries, with handmade baskets used for everything from carrying fuel, gathering food to catching eels and seafood. As an artisan technique, it is also one of the most accessible, and satisfying. Elaine McDonagh is one half of Newgrange Willow Design which gives regular basket weaving classes as well as creating everything from sculptures to handcrafted land art and architectural installations.
If you fancy trying some basket weaving at home, Elaine suggests finding a good willow supplier first. She and her partner Ronan grow their own, which she says is surprisingly easy if you have space. Willow is also renowned for its botanical benefits, beloved of all kinds of fauna and is a natural promoter of biodiversity. In terms of kit, a basic secateurs and a hammer to use as a wrapping iron is enough to get started.
Once you have secured some willow, you need to understand it, she says. “When you get a bundle, it’s usually dry so you may have to soak it for anything from three days to a week in order to be pliable enough to work with.” She also recommends getting a good set of instructions, either online or from your library.
Once the willow is flexible, it is good to work with and you can start weaving it into a basic shape. A handy insider tip is if your willow dries out, wrap it in plastic, and use a wallpaper steamer for a couple of hours to rehydrate the wood.
To begin, have modest ambitions. “It’s best to not go for anything too elaborate,” Elaine says. “Learn a few techniques first just in terms of managing the weaving. Learning how to make a base for instance, or a simple border.”
“A round basket is the easiest to start with,” says Elaine. One basket should only take about two or three days to complete. “Don’t try to rush it,” she says. “Do a bit at a time and then stop, you can even leave it out in the rain to soften. Enjoy the process, the results are often surprisingly beautiful, even at the beginning.”
[ Newgrangewillowdesign.comOpens in new window ]
Stitch by stitch

Spurred on by the increased eco-awareness of a new generation of crafters, embroidery has had a resurgence in recent years.
Ireland has its very own embroidery genre, credited to Johanna Carter in 1825 when there was a worldwide revival in the art of lace-making. Known as Mountmellick Embroidery, it is unique as it is the only form of white-on-white embroidery from the 19th century which can claim to be entirely Irish in origin and design.
While it fell into decline, embroidery has had several revivals none more so than now. “A lot of the interest is driven by kids and teenagers,” says Rosemary Murphy of The Constant Knitter, which also supplies tools and threads for embroidery. “A lot of younger people are decorating their clothes, as a way of making them reusable. I think it’s fed into the backlash against cheap fashion.”
Embroidery requires very little investment so it works as a great option for younger crafters. “We have a full stand of embroidery cotton,” says Rosemary, adding, “none of it is expensive.” Inspired by some of the highly decorative work coming out of Japan, younger crafters can access the skills they need through online videos and do-it-yourself books in shops like The Constant Knitter. “We’ve terrific beginners’ books, they are so beautifully put together.”
All it takes is an investment of €10 to €20 for a learner, Rosemary says. “It has become something of a social outlet too. There are embroidery groups that gather together to work on pieces. There are plenty of inexpensive cottons, jeans and fabrics to play with, so it is really easy to get into.”
[ Irishlaceguild.comOpens in new window ]
What a gem
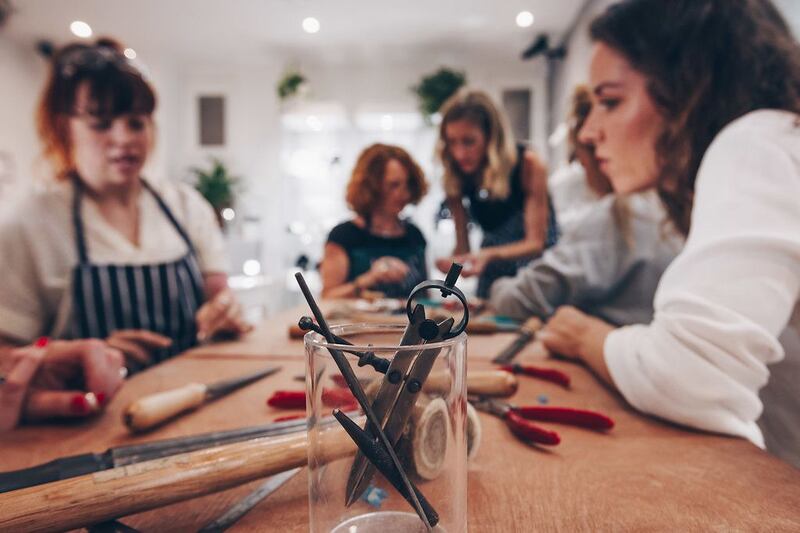
As a craft, jewellery making goes back centuries in Ireland, with early Celtic civilisations renowned for their ornate decorative collars, brooches and torcs. While crafting silver at home can be costly, there are other alternatives. “A great way of making jewellery without all the outlay is wax carving,” says Madeleine of Silver Works Dublin, which does taster jewellery making classes for beginners three times a week.
“You can do a lot with wax carving that you can do with traditional goldsmithing and you only need some wax, a few wax files and wax carving tools and a bit of emery paper. If you’re cutting your wax you’ll also need a saw frame and blades, and for finishing it you’ll need emery paper and a micro motor.”
You can learn to set stones in wax, says Madeline, and you can also, if you like your design enough, get a mould made of it so you can replicate it. "Wax carving can be done at any table really, although again if you sat for hours it would be better to have a higher table so that it is on eye level for you. You can then send your piece of wax to the casters and then they will cast it
into silver for you."
[ Silverworks.ieOpens in new window ]
Plum jam
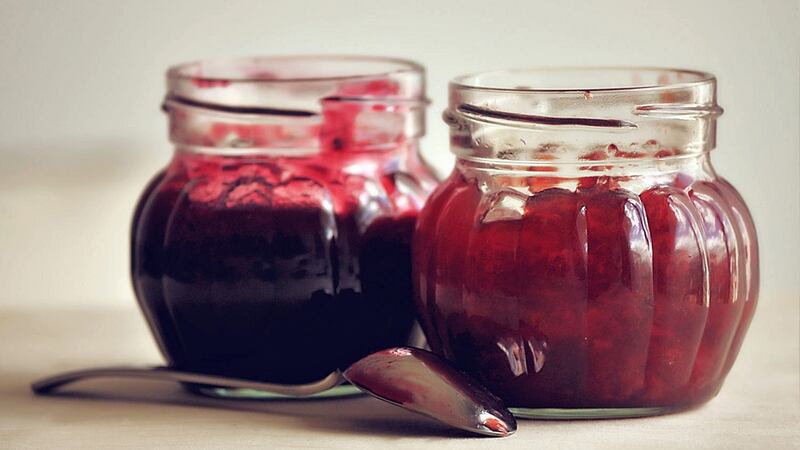
A great way to preserve plums is to make jam in batches, which will potentially keep for months and mean that none of the sweet and juicy fruit goes to waste. Any plums will do, from yellow English Victoria plums, to red or darker purple varieties.
Ingredients:
- Makes: 4 500g jars
- 1.5kg fresh plums (firm, slightly under-ripe)
- 1.5kg granulated sugar
- 1 tablespoon lemon juice
- A knob butter, about 30g
- 100ml cold water
Method: Wash plums and remove stalks. Use a fruit knife to cut the plums in half (vertically), then twist to open and remove the stone. Place fruit, lemon juice and water in a large, deep, heavy-based pot and bring to the boil, stirring frequently. Reduce heat and simmer until the plums have softened, about 40 mins.
Keep on a low heat and add sugar. Stir continuously until the sugar has dissolved. Stir in the butter to help reduce frothing. Turn up the heat and stir continuously until the mixture comes to a rapid boil. Continue stirring on high heat until the jam reaches setting point. If you don’t have a jam thermometer, this is obvious when the mixture starts to stick/set on the sides of the pan or starts to set when you drop it from your wooden spoon. Remove from heat. To test, place a teaspoon of jam onto a cold saucer. Allow to cool, then push your finger through the jam, it should start to congeal and wrinkle up. If you can push your finger through and it’s still runny, you haven’t yet reached setting point. If still not set, return the pot to the heat; bring back up to a rolling boil and test again in a few minutes. Remove from heat and pour gently into clean, sterilised, warm jars. Check for air bubbles and remove. Seal and label while jars are warm. Allow to cool completely, then store.
Classic soda bread

A traditional, yeast-free bread that’s a cinch to make, and perfect for novice bakers.
Ingredients:
- 450g self-raising flour
- 1 level teaspoon baking powder
- Pinch of salt
- 2 dessert spoons sugar
- 50g butter
- 1 egg, beaten
- 250-300ml milk (approx)
Method: Preheat oven to 200°C/400°F/Gas 6. Lightly dust a flat baking tray with flour. Sieve the flour, baking powder and salt into a mixing bowl. Add the sugar and mix well. Rub the butter into the dry ingredients until the mix starts to take on a breadcrumb-like consistency. Once that's done, add the egg and enough milk to make a soft dough, making sure it is not too wet or sticky. Turn onto a lightly floured board and gently knead, until it is just enough to bring the dough together. Transfer to the prepared baking tray and mould into a round shape measuring 4cm deep. Cut a cross on top. Bake for about 40 minutes until golden brown and tapping underneath produces a hollow sound. Serve freshly baked and spread with butter.
Elderberry Cordial
Elderberries can be found abundantly in hedgerows around the country in early autumn. A wonderfully versatile food, you can use them in a variety of ways in the kitchen from soups to jams, to syrups and sauces. Make sure your elderberries are nice and plump and ripe, although if you find some green unripe ones, you can also pickle them and use them as a caper. The berries and flowers are packed with antioxidants and vitamins too.
Ingredients:
- 500g elderberries
- 500g water
- 350g caster sugar
- 1/2 lemon rind plus 1 tablespoon lemon juice
Method: Remove the berries from the stems using a fork then wash them, removing any bits of stalk or leaf. Drain the berries and place in a pan along with the lemon rind. Cover with the water and simmer on a low heat for 30 minutes, until the berries have broken down. Skim away any scum that appears on the surface. Strain the juice through a colander lined with muslin cloth set over a bowl. Gently press the berries to extract as much juice as possible. Return the juice to the pan and add the sugar and lemon juice. Gently heat and stir until the sugar has dissolved. Taste and add more sugar or lemon juice to your taste. Decant into a sterilised bottle and seal.
Craft your own St Brigid’s Cross
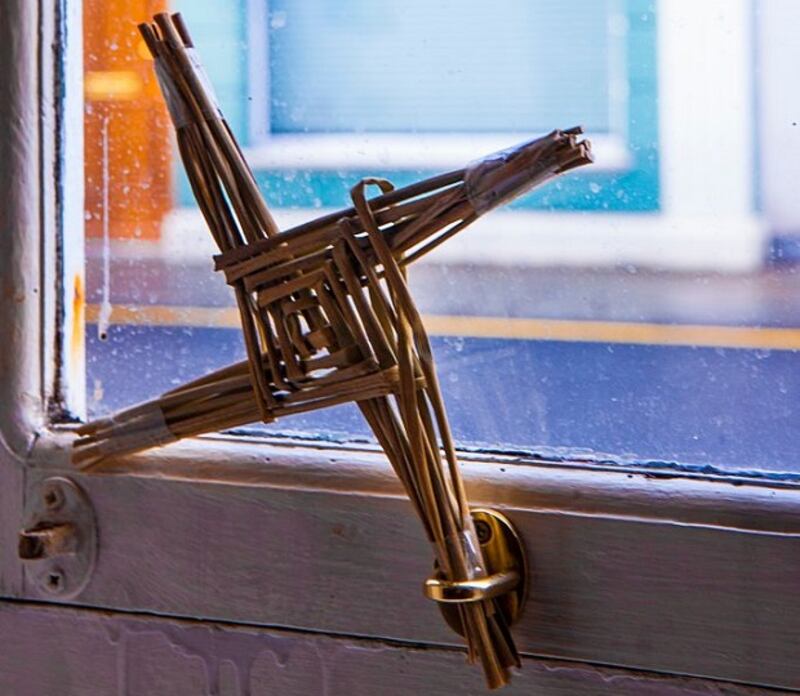
Traditionally made with rushes, you can substitute them for pipe cleaners or paper straws.
Method: Cut your rushes, straws or pipe cleaners to size. Start with one rush, then fold another over it, making a 'T' shape. Then, holding the 'T' shape tight with your fingers, place another rush under the top of the 'T' and fold it over, holding tightly. Rotate the cross to the right. Continue on in this way on each side, layering the rushes until you see the shape forming. When you're happy with the size, neaten the edges of the cross with a scissors and tie them with elastic.


